Showing posts with label Cake. Show all posts

Thursday, March 15, 2012

Banoffee Pie

I'm going to warn you: this pie is crack.  So easy to make, so delicious to eat.

Now if you remember "Love, Actually", there's a scene when Keira Knightley visits that one guy that is secretly in love with her to see if he has video from her wedding.  At the door, she offers to give him pie, banoffee pie, in exchange.  Now, if you're like me, you were probably thinking, "What the heck is banoffee pie?"  This, my friends, is banoffee pie.


It doesn't look that  spectacular, I know, but it is delicious.  In essence, banoffee pie is banana-toffee pie.  Usually it's a cookie crust (graham cracker, shortbread, oreo, whatever), topped with bananas, dulce de leche, and whipped cream.  

Now you can make your own dulce de leche using a can of sweetened condensed milk.  There are a couple of safe(r) ways: oven and slow cooker; and a more dangerous way that many people tend to do it where you boil the unopened can of sweetened condensed milk on the stovetop for a couple hours.  Google it and you'll find a variety of methods and ideas.  The benefit of making your own is that as long as the can is unopened, you can store your dulce de leche in the cupboard for months.  It's also cheaper - a can of condensed milk with run you maybe a buck and some change, a can of dulce de leche is maybe $3-4.

If you don't have the time or are unwilling to make your own dulce de leche, head over to the grocery store.  If you're lucky, you can find a can of dulce de leche already made (check the Mexican or Hispanic section).  This is what I used.

Anyways, this pie doesn't really have a recipe because it's super easy.  Here's what I did:

1. Prepare crust (either make it or buy it).
2. Slice bananas and layer on bottom of crust (I did three bananas because I like bananas and wanted a big pie, I think this amount was perfect.  I also put the bananas on bottom so they've be covered and less likely to brown).
3. Spread one 14 oz. can dulce de leche over bananas (I heated mine up in the microwave for a few seconds just to make it easier to spread).
4. Top with whip cream.
5. Place in fridge.
6. Eat pie.  Delicious, creamy, crack pie.

Friday, June 4, 2010

Excellent Summer Treat - Easy Ice Cream Cake!

Hello all! I apologize for not posting more... I have been baking and discovering yummy new recipes but haven't taken the time to put them up. Here is one that I did today for my bell choir's summer picnic and it looks DELICIOUS! I have some pictures from the process but I took them on my parents' camera cause it was in the kitchen... and then they took it with them to Iowa. So I'll post them later if I remember. But it's easy and doesn't really require pictures. Before I begin, I must give credit to my roommate Katie; this recipe came from her grandma, if I recall correctly.

Ingredients:
1 bag original Oreos
1/2 stick butter or margarine, softened
1/2 gallon ice cream (it's easiest if you get the kind in a box)
1 jar hot fudge topping
1 tub Cool Whip
Chocolate syrup, mini chocolate chips, etc. for decoration

First, crush the Oreos and butter in a gallon Ziploc bag. (I used a food processor to crush the Oreos this time... so much easier than a rolling pin!) Press into the bottom of a 9x13 pan. I added a layer of Hershey's syrup at this point cause it seemed like a good idea.

Then put the ice cream on top of that. If you got the kind in a box, you can just open the box all the way up and cut the ice cream into "slices" which you can arrange in the pan. Much easier than smoothing out individual scoops. Put in the freezer for a few hours.

Once it's re-solidified, take it out and then heat up the hot fudge so that it's spreadable (about a minute in the microwave). Pour it on top and spread into a layer quickly, before it melts the ice cream too much. Return to the freezer.

Before serving, top with Cool Whip, decorate as you see fit (drizzle chocolate syrup, scatter mini chocolate chips over the top, etc.) and then ENJOY!

Mmmm... I made mine with Cookies and Cream ice cream today and am seriously looking forward to it.

Thursday, March 4, 2010

Brownie Pizza

For my friend's birthday, I got a request to make brownie pizza. I had never heard of this concoction before. She emailed me the recipe and whoa, it looks delicious.

I wish I had a pizza pan as baking the brownies to look like an actually pizza would have been way cooler. And as for the fruit, the recipe calls for strawberries, bananas and pineapples (like a banana split!) but just imagine the possibilities...you could go crazy!

The brownies are made according to the box. I just made mine in a 9x13 pan.

I doubled the cream cheese as I had two blocks and no idea what to do with the extra block. And who doesn't like cream cheese?

Strawberries and bananas get organized nicely. I was just going to jumble them on there as I thought it would look cool and abstract. But order prevailed.

Add the magic chocolate syrup and then all of sudden things look fancy. And delicious.


I haven't tried it yet, but I shall be sure to update you all on what will undoubtedly be very delicious.

Update: Ridiculous. That thing was so good we ate the entire pan. Good lord.


Brownie Pizza

1 (20 ounce) box fudge brownie mix
1 (8 ounce) package cream cheese, softenend
1 (8 ounce) can crushed pineapple, drained, juice reserved
2 tablespoons powdered sugar
2 bananas, sliced and tossed in lemon juice to prevent browning
1 cup fresh strawberries, sliced
Chocolate syrup, for drizzling

1. Preheat oven to 350 degrees. Grease a 15-inch pizza pan. Prepare brownie mix according to box directions. Pour into the prepared pan. Bake for 20 minutes, or until done. Remove from the oven and cool.

2. Beat the cream cheese, pineapple, and sugar together. Use any reserved pineapple juice, if needed, to soften the mixture to a good spreading consistency. Spread the mixture over the cooled brownie crust.

3. Arrange the banana and strawberry slices over the cream cheese mixture. Drizzle with chocolate syrup. Refrigerate. To serve, slice as you would a pizza, and enjoy!

Thursday, November 26, 2009

M is for Mud Pie!

So when I was little, we always went to the General Mills picnic and they had a bunch of free stuff... one year they had a little book called the Alpha-Bakery cookbook. No joke, I still use it today. My favorite entry is "M is for Mud Pie," which I share with you today (and which my family enjoyed after Thanksgiving lunch)! Enjoy!


The ingredients:


1 cup granulated sugar
1/3 cup flour
1/3 cup cocoa
1/4 tsp salt
1/2 cup margarine or butter, melted
1 tsp vanilla
2 eggs
1/4 cup mini chocolate chips
1 cup chopped nuts (optional)
1/4 cup fudge ice cream topping
Oreo Cookie Pie Crust
Cool Whip


I realized that I forgot to get an Oreo crust yesterday at about 11:45pm... and so I made a makeshift one by crushing up a bag of Oreos and pressing it into the bottom of a pie plate. I recommend just buying the pre-made crust. Much easier, and better too. So my ingredients picture is technically wrong compared to what I advocate, cause I had the bag of Oreos instead of the crust.


First, put the fudge topping in the microwave for 20-30 seconds, then spread some on the Oreo crust.


Mix the dry ingredients, add in the moist ingredients, then add in the chocolate chips (and nuts, if desired).


Pour into the pie crust, then bake at 325 degrees for about 25 minutes. Cool partially.


Warm up the fudge again, then spread another layer over the top of the pie; cool completely.


Right before serving, spread Cool Whip over the top of the pie and add whatever you want to the top to make it look pretty and delicious! Today I drizzled Hershey's syrup and more mini chocolate chips.


Enjoy, and Happy Thanksgiving to all!

Tuesday, November 17, 2009

Grandma Nomie's (Delicious) Caramel Bars

I'm finally posting!!! As you know, I don't cook... I bake, so these are some delicious bars. I'm not sure if I ever made them for you guys; I don't think so. Hopefully I'm up to the JenHen standard of detail in this post so you can try them out!

Here are the ingredients (not very many!):


About 50 caramels
2/3 C evaporated milk
1 box German chocolate cake mix
1 bag chocolate chips
1 C chopped walnuts
1/2 C butter, melted


Unwrap the caramels and put them in a microwaveable bowl with 1/3 C evaporated milk.


Combine the cake mix, butter, the remaining 1/3 C evaporated milk, and chopped nuts.


Put half of the batter into a greased 9x13 pan. Press it down to cover the whole bottom of the pan (I've discovered that parchment paper is good for this).


Bake at 350 degrees for 6 minutes. While it's baking, melt the caramels in the microwave; stir until smooth. Remove pan from the oven. Drizzle the caramel over the top (you will probably not need all of it). Sprinkle some chocolate chips over the caramel layer.


Crumble the rest of the batter over the top and press in with your fingers (or parchment paper). Bake for 18 minutes more. Drizzle with a little more caramel and chocolate chips. "Then enjoy," in the words of Grandma Reishus when she gave me this recipe! :-)


Thursday, September 3, 2009

Lemon Explosions!

(Edit: the original recipe calls these "Lemon Blossoms" but someone at the party I took these to said the name should be "Lemon Explosions!" I whole-heartedly agree and shall change the title of this post!)

So one afternoon I was flipping through channels making a short stop on the Food Network. Paula Deen was on, and while I don't usually care for her, there was a preview for the next recipe after the commercial break. I saw these little cakes and was intrigued. After watching her make these lemon blossoms I thought 1) OMG these things look delicious and 2) OMG these things look so easy to make. I now present to you, lemon blossoms, which happen to be both delicious and easy to make.

A lot of the ease comes from using box mixes. It's got a box of yellow cake mix and lemon pudding. And if you are like Britta (or I guess, were like Britta) and refuse to buy common baking ingredients like flour, this is the recipe for you.

Cake mix, pudding mix, oil, and eggs get mixed together.

As a side note, this can easily be done without a stand mixer. You could use a hand mixer or if you've got really strong arms, by hand. I say really strong arms because the batter is very thick (like "stick a spoon in it and turn it upside down like a blizzard" thick) and it'll probably tire you out.

The batter is put into a mini muffin pan. A word to the wise, the recipe makes about five dozen. So be prepared. Either get a big mini muffin pan that has 24 cups or be ready to move one pan in and out of the oven a lot.

I forgot to take a shot of the finished muffins, whoops...on with the glaze! The recipe says to sift the powdered sugar and I tried that for a while but there's four cups of powdered sugar in there, I got impatient and just dumped it in there, spoiler alert, it worked out fine. Then comes the magic. The zest of one whole lemon. Usually recipes will have just a little bit of zest, but no, you zest the entire darn thing. (Also for those who are new to zesting, be sure to only get the yellow part, the white part is bitter so be sure to move the fruit around every few scrapes.)

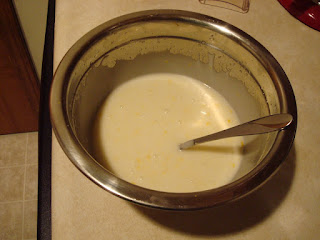
I had to use a lot more water than the recipe called for. It called for three tablespoons, I used six or seven. Either way, the glaze was magic. It was REALLY lemony, like, I AM LEMON, HEAR ME ROAR! I had more than my fair share of samples.
Now on the show, Paula Deed used this method to glaze the little cakes: stick a fork in the bottom of the cake (so the puncture holes don't show),

Dunk those bad boys into the glaze and voila, you're set. Now this would have been fine and dandy if the cakes didn't keep falling off the fork. I soon abandoned the fork method and used the swirl it around in the glaze with my fingers method.

Pretty soon you'll have a bunch of cute, lemony cakes.

And you'll have a lot of glaze. I tried double-dipping some of my cakes, you can see a little difference (the double dipped ones are on the top, those were also the ones that were a little too done from the oven). With this in mind, you could probably cut down on the amount of glaze you make.

Verdict? This recipe is a good bang for your buck. Not only do you make a ton of little cakes (so great for a party), they're really easy to make (and due to the box mixes, probably impossible to mess up). In addition, they look super fancy. It's one of those things people will say, "Wow, do you make this?" in that really high pitched voice, to which you can coolly reply, "Why, yes, yes I did."


Lemon Blossoms

Cakes:
4 eggs
1 package instant lemon pudding mix (3.5 oz)
1 package yellow cake mix (18.5 oz.)
3/4 cup vegetable oil

Glaze:
4 cups confectioners' sugar
1/3 cup fresh lemon juice
grated zest of 1 lemon
3 tablespoons vegetable oil
3 tablespoons water

Preheat the oven to 350 degrees.

Spray miniature muffin tins with vegetable oil cooking spray. Combine the cake mix, pudding mix, eggs and oil and blend well with an electric mixer until smooth, about 2 minutes. Pour a small amount of batter, filling each muffin tin half way. Bake for 12 minutes.

To make the glaze, sift the sugar into a mixing bowl. Add the lemon juice, zest, oil, and 3 tablespoons water. Mix with a spoon until smooth.

With fingers, dip the cupcakes into the glaze while they’re still warm, covering as much of the cake as possible, or spoon the glaze over the warm cupcakes, turning them to completely coat. Place on wire racks with waxed paper underneath to catch any drips. Let the glaze set thoroughly, about one hour, before storing in containers with tight-fitting lids.